Crafting compelling narratives is an art form and is what makes a great book stand out from an easily forgettable book. However, you don’t need to dive into the intricate architecture of story structure with first and second graders for them to understand the importance of a story’s plot.
You can teach young students the importance of story structure simply by focusing on some helpful strategies like using visual examples and of course, reading! Today, we will explore how you can use these strategies for teaching story structure to help your students to teach them the basics of story structure to help them become better readers and writers.
What is story structure?
Although we are all educators and familiar with the elements of storytelling, let’s take a quick moment to review what story structure is before we discuss how to teach it. That way, we are all on the same page as we move forward in how to use different strategies for teaching it.
Story structure is the sequence of events that take place in a story to create the plot and help guide the reader from the beginning to the end. This is why you may also hear it referred to as plot structure.
Whether using the term story structure or plot structure, it follows the same sequence. First, is the exposition (or the beginning) of the story. This is where an author introduces the setting, characters, and conflict. Second, is the rising action. The rising action includes all of the events that lead to the climax. During the rising action the main character is usually attempting to solve a problem but just can’t quite succeed.
What is the turning point in the story?
The next part in the plot is the climax. The climax of the story is the turning point – this is the point in the story where there is the most action or suspense. Right now, you may be imagining the common plot diagram of a mountain where the climax is listed at the peak of the mountain. We will come back to this image a little later when we discuss plot diagrams.
Just as the story rose towards the climax, it must also come down. Therefore, after the climax is the falling action. These are the events that take place after the climax and lead to the final step in a story – the resolution or the ending.
With this quick review of what elements are included in a story structure, let’s explore several strategies you can use to effectively teach story structure to early readers.
Plot Diagrams
As we mentioned above, many of us may have visualized the mountain peak when thinking of the climax of a story. The mountain is a type of plot diagram that provides a visual representation of the different parts of a story.
The mountain is a clear and easy example for students to see the plot structure and is a great place to begin teaching story structure. However, it is not the only type of visual diagram you can use; nor is it where you want your visual representation to end.
To help students get a more in depth understanding of plot structure we suggest using an additional graphic organizer. The best types of graphic organizers to use for organizing the plot of a story is a storyboard or story map.
In truth, there is not a lot of difference between a story board or a story map. They both allow students to explore the structure of the story in more detail. However, when you use them in your lesson may vary. Moreover, it may vary depending on if you are having students analyze a story they read or plan a story they are going to write.
Using a Story Map to Teach Story Structure
A story map is commonly used as a tool for students to demonstrate their understanding of what happened in a book. Whether it is a picture book students are reading in the first grade or a short story students are reading in sixth grade, a story map can be a helpful tool.
A story map can look several different ways. For example, one map might move horizontally across a page while another may move vertically down the page. In addition, as a teacher you may feel creative and want to use different shapes for different story elements. However you choose to organize and design the map it will still include the same type of information. It might include: different boxes (or shapes) that each highlight different story elements or events in the plot.
In contrast to the mountain plot diagram that may only list exposition at the base of the mountain, a story map gives students an opportunity to provide details for specific story elements such as characters, both the main character and supporting characters, the details of the setting, and the specific details of the conflict. Then, they will continue to map out the specific key events as they happened in the story – all the way through to the end.
StoryBoard for Teaching Story Structure
Like a story map, a story board also allows for students to diagram the plot and story elements in more detail. However, while a story map is most commonly used at the end of a lesson to demonstrate reading comprehension, a storyboard is more commonly used at the beginning of a lesson. Moreover, a storyboard is typically used as a strategy for writing.
Similar to a story map, a storyboard is another type of graphic organizer that will have different boxes for students to organize their ideas and plan out their story. In contrast to a story map, a story board may have even more boxes or room for students to plan out all of the important elements of their story in detail. For example, within the main character box you could add space for students to describe the character traits that their main character will have.
Whether you are teaching students about narrative writing or having them write a fairy tale, a storyboard is a great way to help them organize the plot and key story elements. Even if your students are not focusing on developing their own writing, a story board can be used in the same fashion as a story map for students to demonstrate their comprehension and knowledge of the events in a story.
Read Passages as a Whole Group
It should be no surprise that one of the most effective ways to teach plot structure is through reading! Moreover, through reading as a whole group. This is one of the many reasons that reading alouds are essential in an elementary school classroom.
When you read as a whole group it provides you as the teacher with several opportunities to teach story structure, as well as additional literary elements through discussions with your students. One way to help enrich these discussions is to create text dependent questions ahead of time.
In our read alouds, we do this by dividing our whole group text dependent questions into several categories that we explore over the course of three days: before reading, story sequences, story elements, character development, craft and structure, words and illustrations.
By organizing the questions into these categories it provides students with several opportunities to focus on key story elements over the course of several days. Moreover, it provides students with a familiar routine to use when reading a text (and you as the teacher with several days of reading lesson plans!).
Here are some suggestions on how to create a reading routine in your classroom that will help you teach not only story structure, but all the key story elements.
-
A Crankenstein Valentine Read Aloud Lesson Plans and Valentine’s Day Craft
$4.50 Add to cart -
Pig the Pug Read Aloud Activities Bundle-Aaron Blabey Book Companions
$18.00 Add to cart -
The Most Magnificent Thing Read Aloud for Preschool-Growth Mindset Activities
$4.50 Add to cart -
The Big Cheese Book Companion-Good Sportsmanship Activities
$4.50 Add to cart
Lesson Plan for Story Structure
Day 1: Complete a first read with your students. Prior to reading the book, guide them through pre reading questions such as, “Does the title of the book give us any clues about what it will be about?”
After the first read, check students’ reading comprehension by asking what happened first in the story, what happened next, and what happened at the end of the story. These are three easy questions that will help introduce students to story structure. You can also use a story map to help students map out the events – they could even draw what happened!
Complete the first read with questions that focus on key story elements such as who is the main character, where does the story take place, what is the problem in the story, and how does the problem get solved.
While these three focus areas will give students a great introduction to the story and story structure, don’t stop there. We suggest continuing to explore the story for at least one or two more days.
Two and Three day lesson plan for story structure
Here is a quick overview of what we would include in each lesson plan for day two and day three of a read aloud:
Day 2: Character Response questions and Craft and Structure questions
Day 3: Words and Illustrations questions
In addition, we would encourage you to include additional learning activities such as writing prompts or vocabulary practice to further enrich students’ learning and development of reading skills with each book.
Another thing to consider when creating a read aloud lesson plan is providing different ways for students to demonstrate their understanding. We do this in our read alouds by providing a digital or printable option in all of our read alouds.
Therefore, whether you want to add variety by using different formats from time to time, let small groups choose a format, or even provide differentiated instruction for each student based on their learning needs, you have options. You can see examples of our reading lesson plans and differentiated activities in any of our read alouds.
-
Smiley Shark PREK Book Companion and Friendship Activities
$4.50 Add to cart -
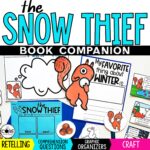
The Snow Thief Book Companion-Winter Read Aloud Activities
$4.50 Add to cart -

The Snow Thief PREK Book Companion-Winter Read Aloud Activities
$4.50 Add to cart -
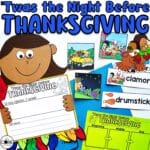
Twas the Night Before PREK Thanksgiving Read Aloud, Craft & Writing
$4.50 Add to cart
Story Structure teaching resources
When it comes to teaching story structure, the combination of a well thought out read aloud and supporting graphic organizers is the best strategy. This combo gives you everything you need from guided questions to visual representations.
In addition, there are other teaching resources that will further enhance these strategies. Anchor Charts!
We love anchor charts because teachers can use them to support learning in so many different areas. Moreover, they are super easy to make and you can make it as part of your lesson!
One easy way to do this is by making an anchor chart of the same story map you give your students. This provides them with a visual while they are making their own story map and then gives you as the taher a tool you can easily reference while teaching. In addition, you could create a simple anchor chart with the mountain diagram on it to use all year long as a quick guide to story structure.
Whether you choose to add an anchor chart to your lesson on story structure, remember that sometimes the best strategies are the simplest. So, grab a read aloud and a graphic organizer and enjoy teaching your students how a story is created!


